
From Web to Mobile using Capacitor
In this post, we’ll try to give you every info you need to take any web application (Ionic, Angular, React, here Vue.js) and package it as true Android & iOS apps with native features (GPS, Camera Universal links, Keyboard, StatusBar…) thanks to Capacitor. We’ll start with a web-only Vue.js application and end up with mobile applications automatically build from gitlab and ready to be deployed on the stores.
You can dive directly to the technical stuff if you do not want to read the introduction (in which we will discuss native/hybrid/compiled apps and the Capacitor philosophy).
All examples come from the Fishola application, which is open-source, so feel free to reuse the code as much as you like and give us feedback if you find other usages or improvements.
We’ll assume in this post that you are already familiar with web applications (Angular/Vue/Ionic/React/whatever), but do not have any knowledge regarding mobile app development
Our need
We’ll never insist enought on the fact that in software development there is no best solution: it depends on your project goals, context, planning, budget, the tools and the knowledge you have.
What we already had:
- a web application (Vue.js) allowing end-users to provide fishing-related data (measurements, locations, pictures) for scientific purpose
- a dev team fond of Vue.js but without experience in native (Kotlin/Swift) or compiled (Flutter/React…) app development
What we wanted:
- exactly the same app, but running as a mobile app (so that we can leverage on the native features such as camera, GPS, offline mode…) and available on the PlayStore and AppleStore
- with as few modifications on the existing code as possible (for timing considerations)
- without having to introduce too many new concepts & langages to the dev team
- relying as little as possible on closed and proprietary solutions. Yes, we’re talking about Apple, that forces you to own an iPhone and a Macbook to develop. This goes against everything we believe and stand for at Code Lutin, so we really want to get rid of closed environements like iOS everytime it is possible
If you’re not familiar with Vue, it won’t cause any comprehension issue, just consider we’re working on Angular or watch this 100s Vue.js presentation.
Native vs Hybrid vs Compiled
Let’s take a few minutes to describe all the methods we have in 2020 to develop mobile applications. If you’re in a hury you can skip this chapter, we’re just going to sum up what are native, hybrid and compiled apps, and why we decided to aim for an hybrid app for our project.
If you’re interested in this specific topic, there’s a ocean of detailed comparaisons such as Udemy’s Flutter vs React Native vs NativeScript vs Ionic vs PWAs video.

Native apps
Native Android apps are written in Kotlin and/or Java, using native frameworks such as Android Architecture components or Retrofit. In iOS, that would be Swift (coupled with Moya, Realm). Clearly, mobile apps are as close as possible of the OS you’re targeting, so of course if what you aim for is having access to the latest Android or iOS features day one, or if you want the best performances, native apps are clearly the best option. In a past life, I used to develop native mobile apps. I have to say although I won’t miss old objective-C iOS projects, recent frameworks (such as Android Architecture Components) provide really elegant and efficient APIs allowing to quickly develop and easily maintain mobile projects.
But in 2020, I challenge you to determine if a given app is native, hybrid or compiled simply by using it. It used to be the case : hybrids apps where slow, animations weren’t smooth, the look’n’feel was not optimal. But nowadays, even an hybrid app can provide really good performances if you don’t have real-time considerations. Your app will maybe render 110 frames per second instead of 140 in native, which most of the time is perfectly acceptable.
In our context, we decided that :
- Native apps require too much learing (programmation langages, tooling, frameworks)
- They require to write everything twice or three times (once for Android, once for iOS, once for Web), which has impact on maintenance cost
- We could not leverage from our existing Vue.js code
- We want to avoid writing iOS native code if we have another option
Hybrid apps
Hybrid apps used to be considered the solution for lazy programmers. Basically you could see them as fancy browser, who can intercept some JS events and trigger native code. As we’ll see in details later, hybrid runtimes such as Capacitor or Cordova provide JS plugin for manipulating native features (Camera, GPS, Bluetooth, keyboard…).
In our context, it seemed that :
- Hybrid apps require the less learning (we could reuse 100% of our Vue.js code and just plug a few plugins for dealing with native features)
- Thanks to hybrid plugins, the same JS code is used for all platforms, which eases maintenance
- A Mac is still needed to sign and publish builds, but not for developping. As we’ll see later, there are projects trying to make xcode builds under linux to avoid using a Mac at all.
Compiled apps
Compiled apps are really trending, with Flutter and React Native leading the hype train, but many others could be quoted (NativeScript being one of them). The idea behind compiled apps is that a big part of your code gets compiled in native code, or code that uses native UI, while being written in the same langage for every plateform (Typescript or Dart for Flutter). Compiled apps try to provide the awesomeness of native code (performances, native feel) with the portability of hybrid code (one single codebase).
Compiled apps are clearly interesting, and if we did not have the requirement of making as few change as possible in our existing codebase, we would have taken a closer look into it (especially to NativeScript-Vue and Vue Native). If you have developped using one of these frameworks feel free to share your experience, we’re definetely interested.
But in our context, we ruled out compiled apps for the following reasons :
- Compiled apps require too much learing: programmation langages, new frameworks, logic, codestyle
- We could not leverage easily from our existing Vue.js code
Capacitor: a cross-platform native runtime
So we decided to package our webapp as an hybrid app. Cordova used to be the no-brainer to produce hybrid apps since 2009, but an increasing part of the cordova community is quickly migrating to Capacitor. Capacitor could be seen as a spiritual successor of Cordova, taking into account all the feedbacks brought by the dev community and 10 years of Cordova experience. It has been created in 2018 by the Ionic framework team. That being said, there’s a growing and diverse community writing additional Capacitor plugins.
Basically, Capacitor is a framework that wraps your webapp in a native Web View and enhances it by adding the ability to communicate with native code through JavaScript APIs (packaged as plugins). If you’re wondering how Capacitor stands next to Cordova, you can see both of them as instances of cross-platform native runtime for webapps. So if Cordova is Internet Explorer, Capacitor is Firefox. Both target the same goal, but differ in the way they achieve it.
Cordova’s moto is “Write Once, Run Everywhere”, meaning that from a single codebase Cordova’s goal is to wrap it as mobile application by itself, managing all the configuration for you. Whereas Capacitor’s moto is “Write Once, Configure Everywhere”, meaning that Capacitor’s goal is to generate the mobile projects but let you configure it as you see fit. Mobile developpers know that most of the time when you try to solve an Android bug you’ll find stackoverflow posts about how to change your gradle scripts but not much about how changing your plugin.xml cordova file.
This may seem a detail but this changes the whole hybrid approach, at least according to me. We could quote 3 main principles that make Capacitor differ from Cordova :
- Mobile apps generated by Capacitor are treated as real projects, supposed to be part of your source tree. For instance Capacitor will generate a standard Android project that you are free to configure, modify and extend using Android Studio. This allows to benefit from each platform features instead on relying on the intersection of both worlds. This also allows to manage build, signin, or any issue with the appropriate tooling. For instance, on the Fishola project, we were able to define gradle flavours to customize Universal Links and signin
- Capacitor is, by nature, plugin-based. It means that capacitor core is really light (it only embeeds what is required to allow JS bridging) and that you only add to your project the native feature you need.
- Capacitor prioritizes stability over features. This is mandatory for us, as I do not want to spend time fixing migration issues and regressions. Have a look at Capacitor roadmap and you will see that although the project is quite new all of the targeted features are already here, the 2.0 release is just supposed to focus on stability, adjustments to keep-up with new Android/iOS versions & upgrade simplicity.
Note that we’re using Capacitor to generate iOS and Android apps but it is also supposed to work with desktop apps (Electron).
The list of already available Capacitor plugins is quite impresive. I’m far from having tested all of them but what I’ve used worked well and required as few dev as possible (most of the time a few JS lines do the trick). In this post, we’ll detail Deep-linking, Camera, Geolocation, StatusBar, Keyboard, but know that there also are plugins for supporting Push Notifications, Bluetooth, Storage, Haptics, Accelerometer, Accessibility…
If you’re interested in how Capacitor works under the hood, I invite you to read this post by capacitor’s creator Max Lynch.
Setup your webapp
The main reason for which we chose Capacitor is that you don’t have to bring a lot of changes to your webapp to turn it into a first-class mobile app.
First things first, let’s install capacitor and its cli (Command Line Interface) using npm :
npm install --save @capacitor/core && npm install --save-dev @capacitor/cli
Now we have access to the Capacitor cli through the npx cap * commands. Let’s initialize capacitor on our Vue.js project :
npx cap init APP-NAME PACKAGE-NAME (e.g. npx cap init fishola fr.inrae.fishola)
This will create a capacitor.config.json file that you’re free to edit. It specifies some core information such as your app id, main colors, user-agents, the location of the js build it must embed in the mobile application… On Fishola, npm run build creates a target/dist folder containing our minified webapp. So we set the "webDir" property to "target/dist".
Please refer to the documentation to see what can be configured in this file.
![]() And that’s it ! Now we are ready to generate our mobile applications.
And that’s it ! Now we are ready to generate our mobile applications.
Generate Android Studio project
Let’s say to Capacitor that we want to generate an android app for this project :
npx cap add android
This will generate an Android Studio project that you can edit as a native project using Android studio. By default, your project will contain a WebView that loads the capacitor library + your app. As your js build is embeded and packaged inside the mobile application, even if it’s the first time the user launches the app and there’s no internet access, your app will still have all it needs to work.
If you’re on Linux, you can add the
"linuxAndroidStudioPath”: “/usr/local/android-studio/bin/studio.sh”configuration line to capacitor.config.json. This will allows you to runnpx cap open androidto directly open Android Studio on the generated project - of course you’ll have to install Android Studio first :)
If you’re using custom splashscreen pictures, you may find they are a bit streched under certain resolutions (it is a known issue that should be fixed soon). Just know that you can work-around this by replacing the NoActionBarLaunch style to use a color :
<style name=“AppTheme.NoActionBarLaunch” parent=“AppTheme.NoActionBar”>
  <item name="android:background">#F7F7F7</item>
</style>
Generate XCode Project
Let’s say to Capacitor that we want to generate an iOS app for this project :
npx cap add ios
Exactly as for Android, this will generate an iOS project that you can edit as a native project using XCode. By default, your project will contain a WebView that loads the capacitor library + your app.
If your app requires cookies to ensure authentication, you will need to add “server”: { “hostname”: “<SERVER_URL>” } to the capacitor.config.json file to avoid CORS errors (check out this example). A brand new http plugin is in active development for adressing this problematic.
You will probably also have to handle the iOS safe areas for iphone X and above (see these explanations). Use the
env(safe-area-inset-top)css variable in your margin-tops to prevent your application from rendering on top of the status bar.
Update apps when webapp changes
Now that we’ve got both Android & iOS set up, we can keep on developing our application as it if was a webapp: we write Vue.js code and test it in our browser.
That being said, when testing a native feature, or just before a release, we need to update the mobile applications with the latest version of our webapp code. This goes rather simply:
- build your webapp as usual (e.g.
npm run build) - tell capacitor to copy the latest build into your mobile projects (
npx cap copy) - run the app on your test device using Android Studio or Xcode (remember you can directly open the IDE on the project using
npx cap open android/ios)
![]() And that’s all ! Of course these commands can be automated in a gitlab build for instance (more on than later).
And that’s all ! Of course these commands can be automated in a gitlab build for instance (more on than later).
Add native features
At this point, we already have a mobile application : it embeeds all the code it needs so it supports offline mode, and the capacitor library already took a lot into account even if you didn’t notice it yet. For instance, all the console logs are automatically redirected to the native logs : console.info(), console.error(), console.warning() directly write into your Android Logcat and iOS console. Pretty neat.
Using Capacitor plugins
But the main reason for which we wanted to use Capacitor is to benefit from the Capacitor plugins, which allow you to write JS code in your webapp that will interact with native code in your mobile app.
In this chapter we’ll talk about the plugins we used for the Fishola project, but please keep in mind that there a lots of other plugins available (Bluetooth, haptics, push notifications….)
Handling the Keyboard
Let’s start easy with the Keyboard plugin. If you already had to implement forms in mobile apps, you will probably agree that making sure your app remains usable when the keyboard shows can be… challenging :)
To help you achieve this, Capacitor provides a Keyboard plugin notifying when keyboards appears/disappears. This also lets you add an accessory bar to the iOS Keyboard allowing user to go to the next/previous input and hide keyboard (definitely a good idea, as this is default on most Android keyboards eases navigation).
import { Plugins, KeyboardInfo } from '@capacitor/core';
const { Keyboard} = Plugins;
[...]
setupKeyboardConfiguration() {
  // Step 1: Keyboard configuration: show accessory bar (on iOS)
  // This bar is displayed on top of keyboard and allows to navigate
  // Through inputs + hide keyboard
  Keyboard.setAccessoryBarVisible({isVisible: true});

  // Step 2: Listen for keyboard showing events
  // 2.1: Keyboard is just about to show
  Keyboard.addListener('keyboardWillShow', (info: KeyboardInfo) => {
      keyboardShowing(info);
  });
  // 2.2 Keyboard has done hidding
  Keyboard.addListener('keyboardDidHide', () => {
      keyboardHiding();
  });
}
We leveraged on that by defining a KeyboardManager (complete code here) that will, when keyboard shows/hides:
- hide/reveal all DOM elements tagged with the
.hidenWhenKeyboardShowsCSS class - add/remove the
keyboardShowingcss class to all DOM elements tagged with the.keyboardSensitiveCSS class, allowing some elements to render differently when keyboard shows
Here’s a simplified version of the KeyboardManager:
private keyboardShowing(keyboardInfo: KeyboardInfo) {
  // Step 1: hide elements
  let toHides = <HTMLElement[]><unknown>document.querySelectorAll(KeyboardManager.CSS_HIDE_CLASS);
  toHides.forEach( toHide => {
      toReveal.classList.add("hidden");
  });

  // Step 2: add 'keyboardShowing' class for .keyboardSensitive elements (and .page)
  let keyboardSensitives = <HTMLElement[]><unknown>document.querySelectorAll(KeyboardManager.CSS_KEYBOARD_SENSITIVE_CLASS);
  keyboardSensitives.forEach( keyboardSensitive => {
      keyboardSensitive.classList.add("keyboardShowing");
  });
}
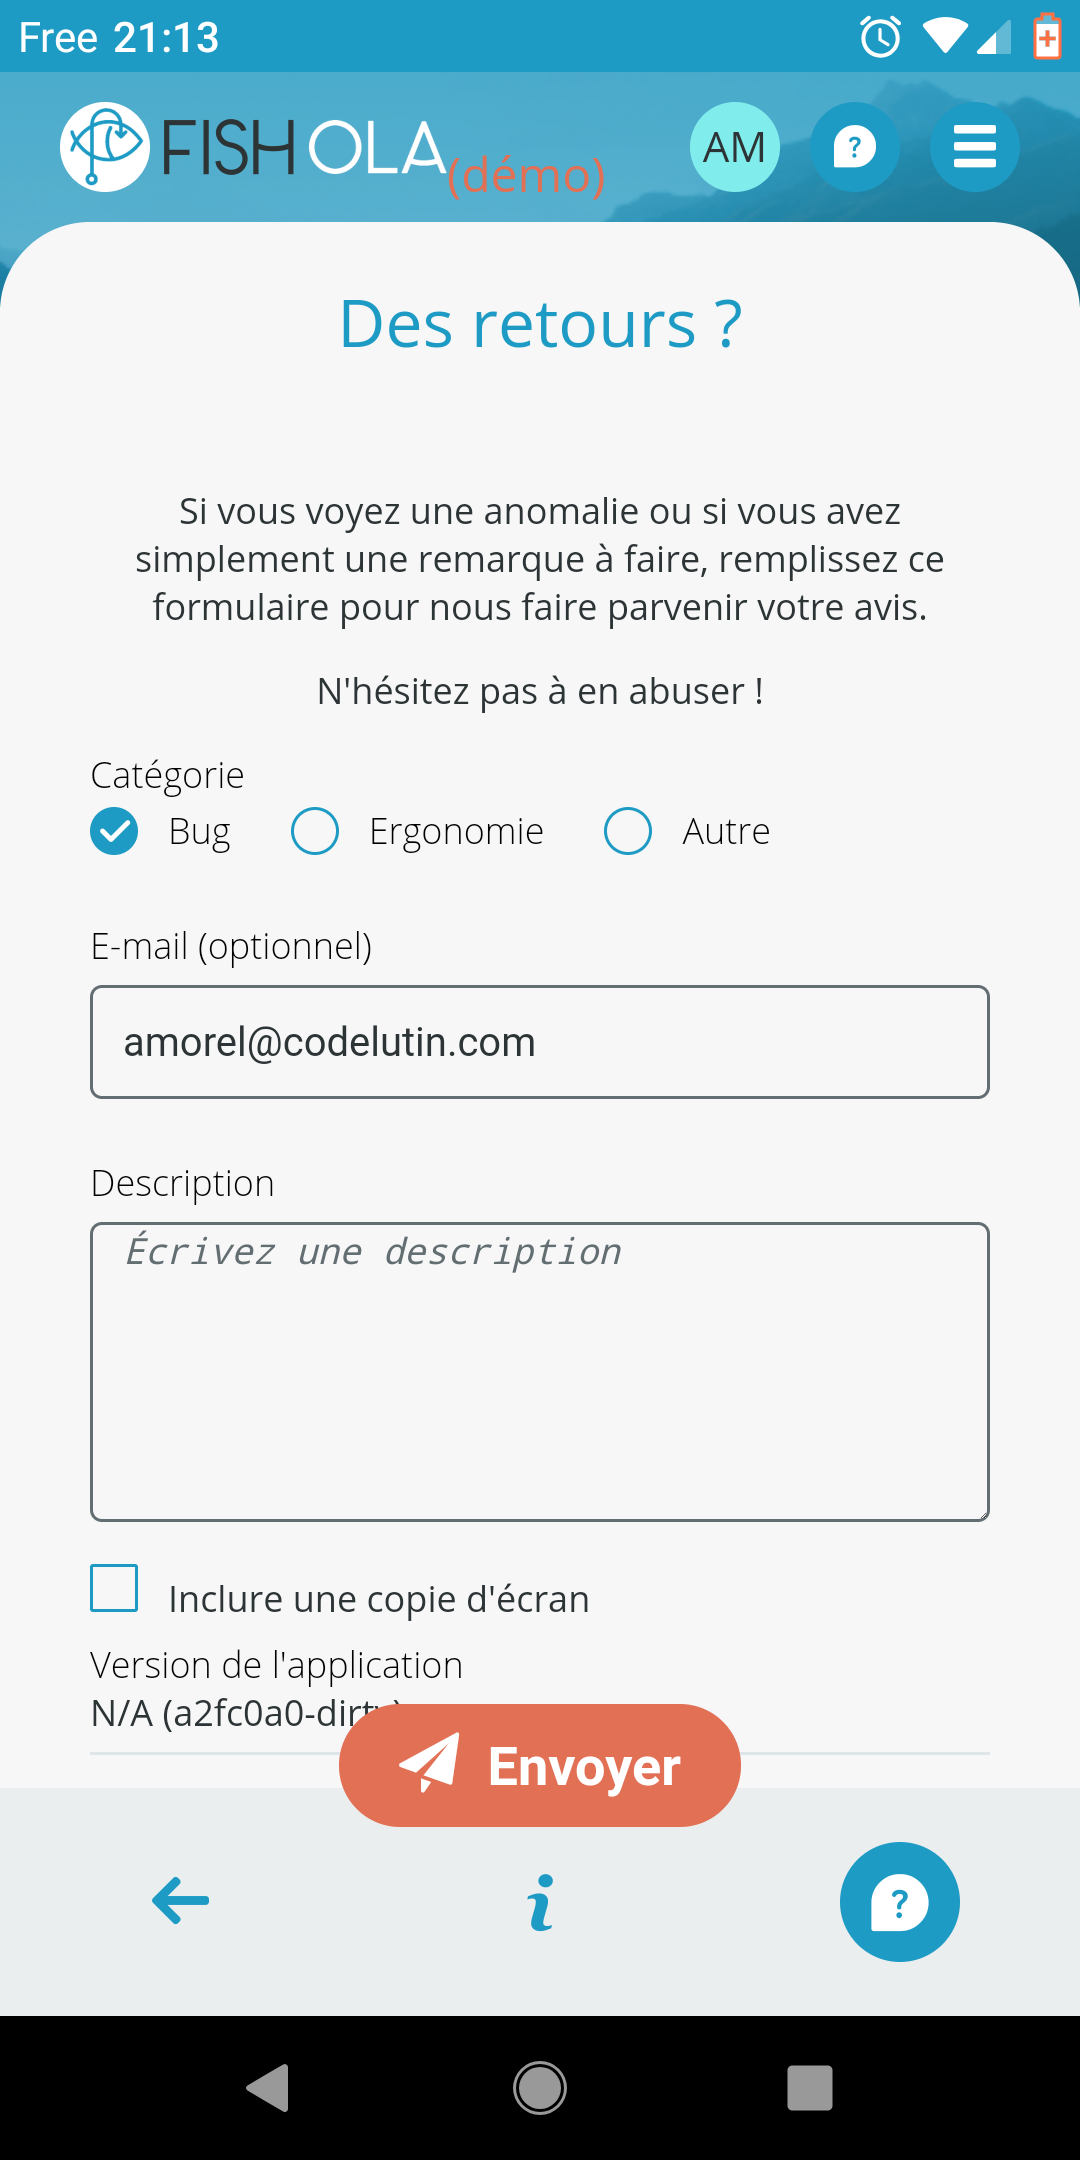
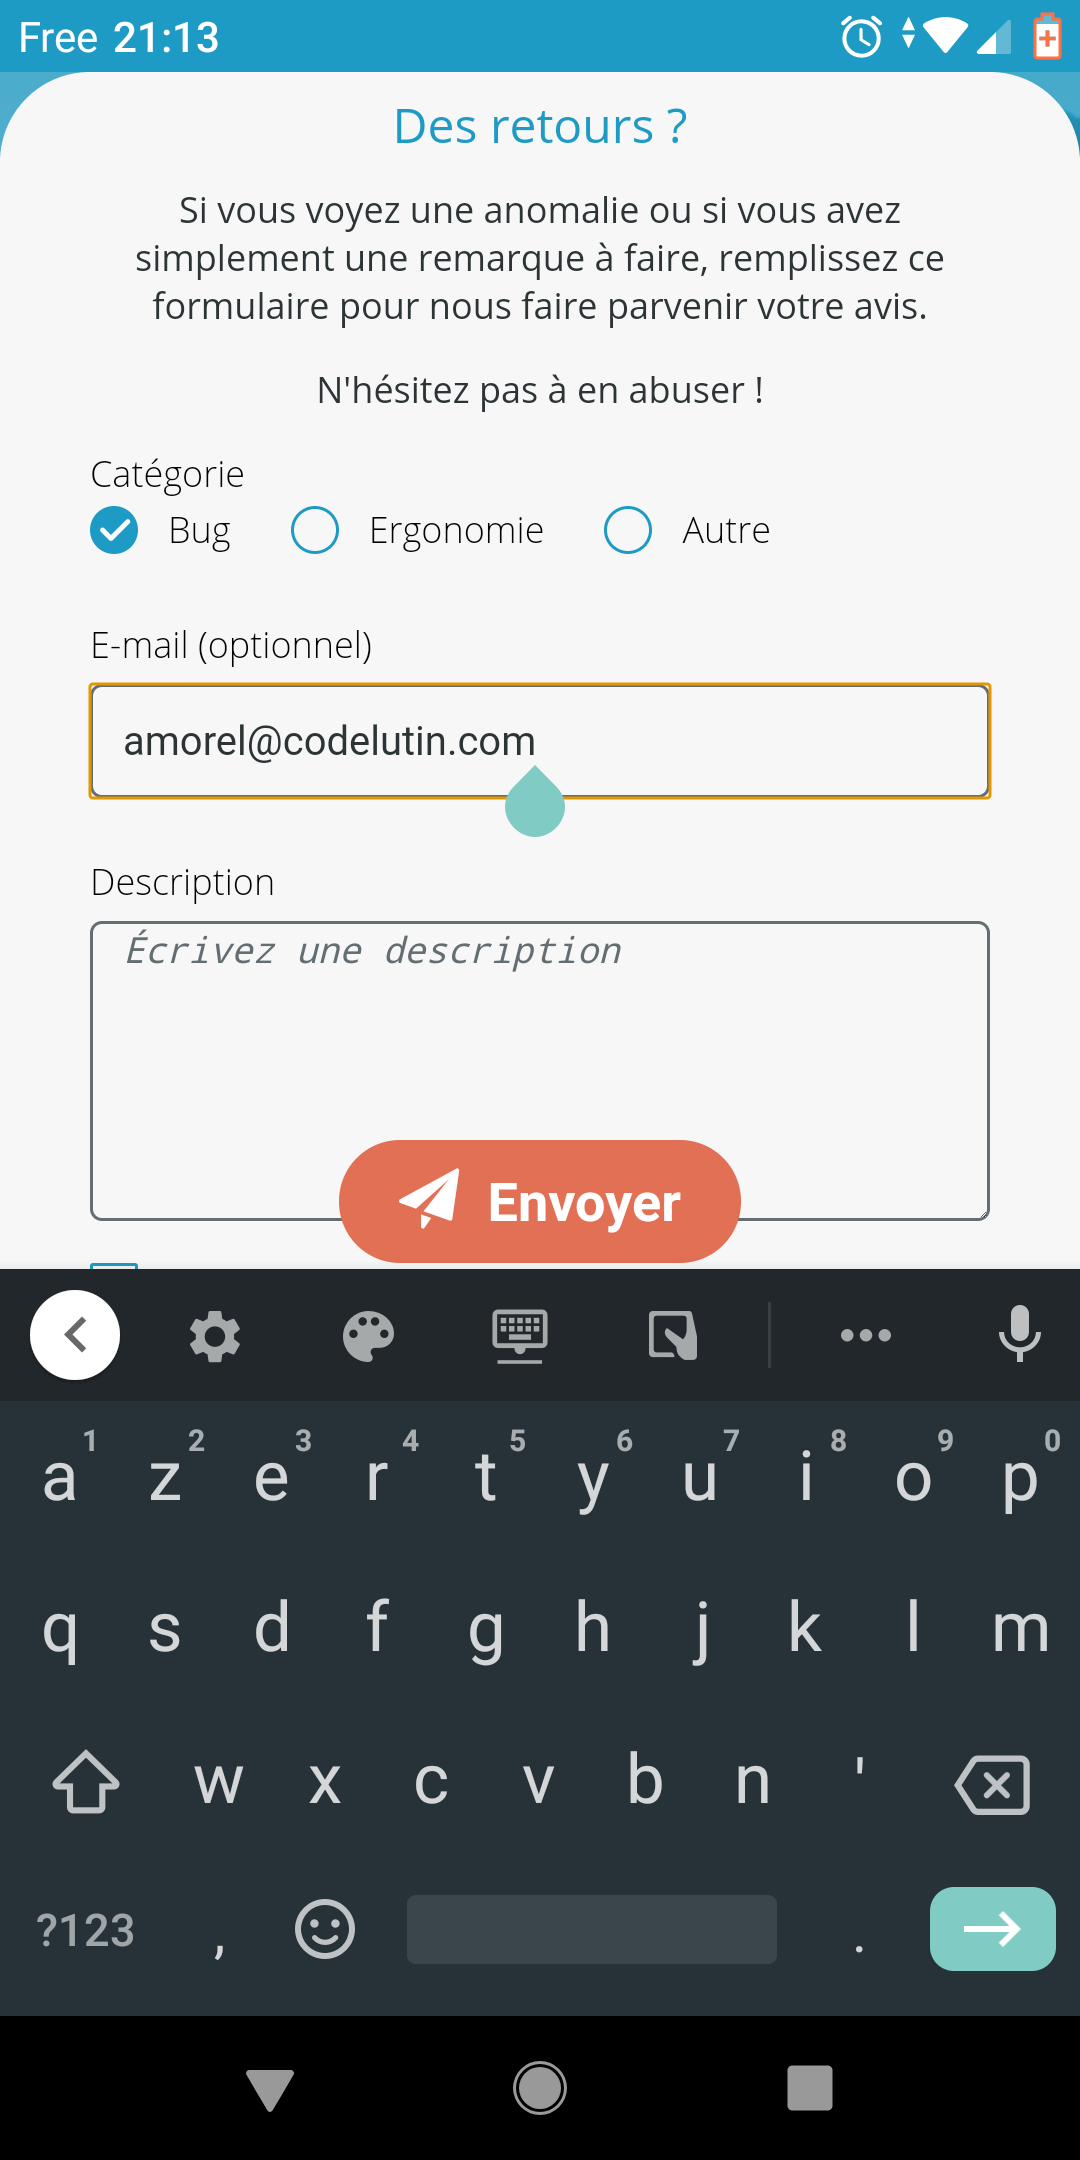
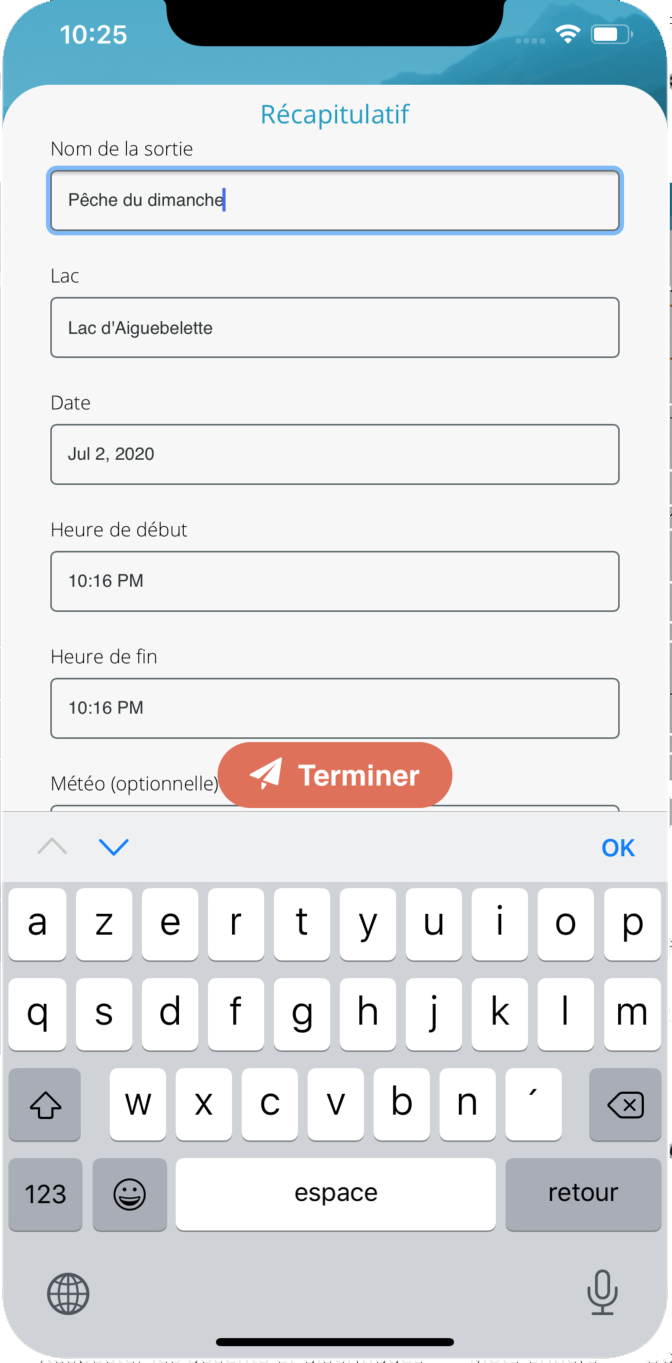
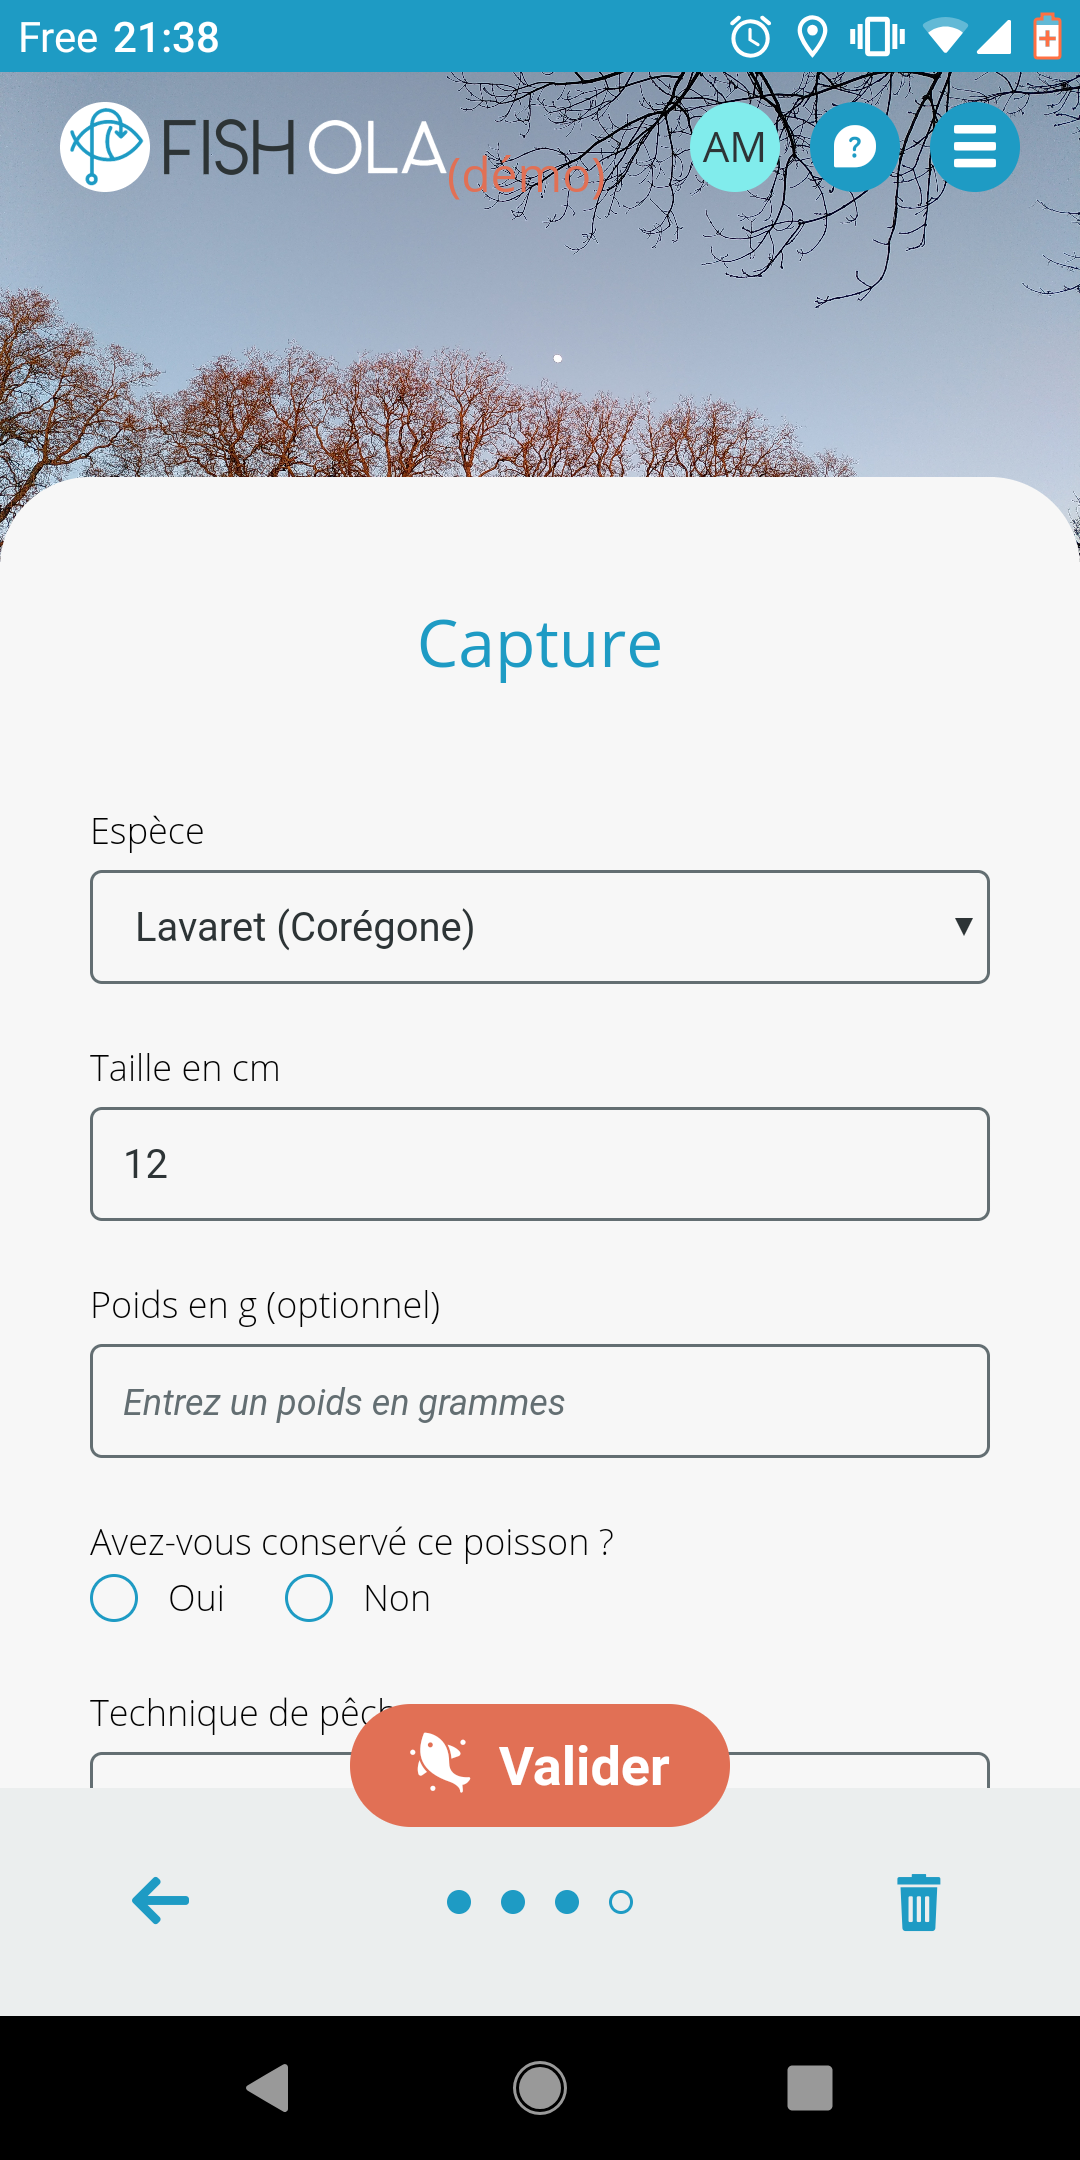
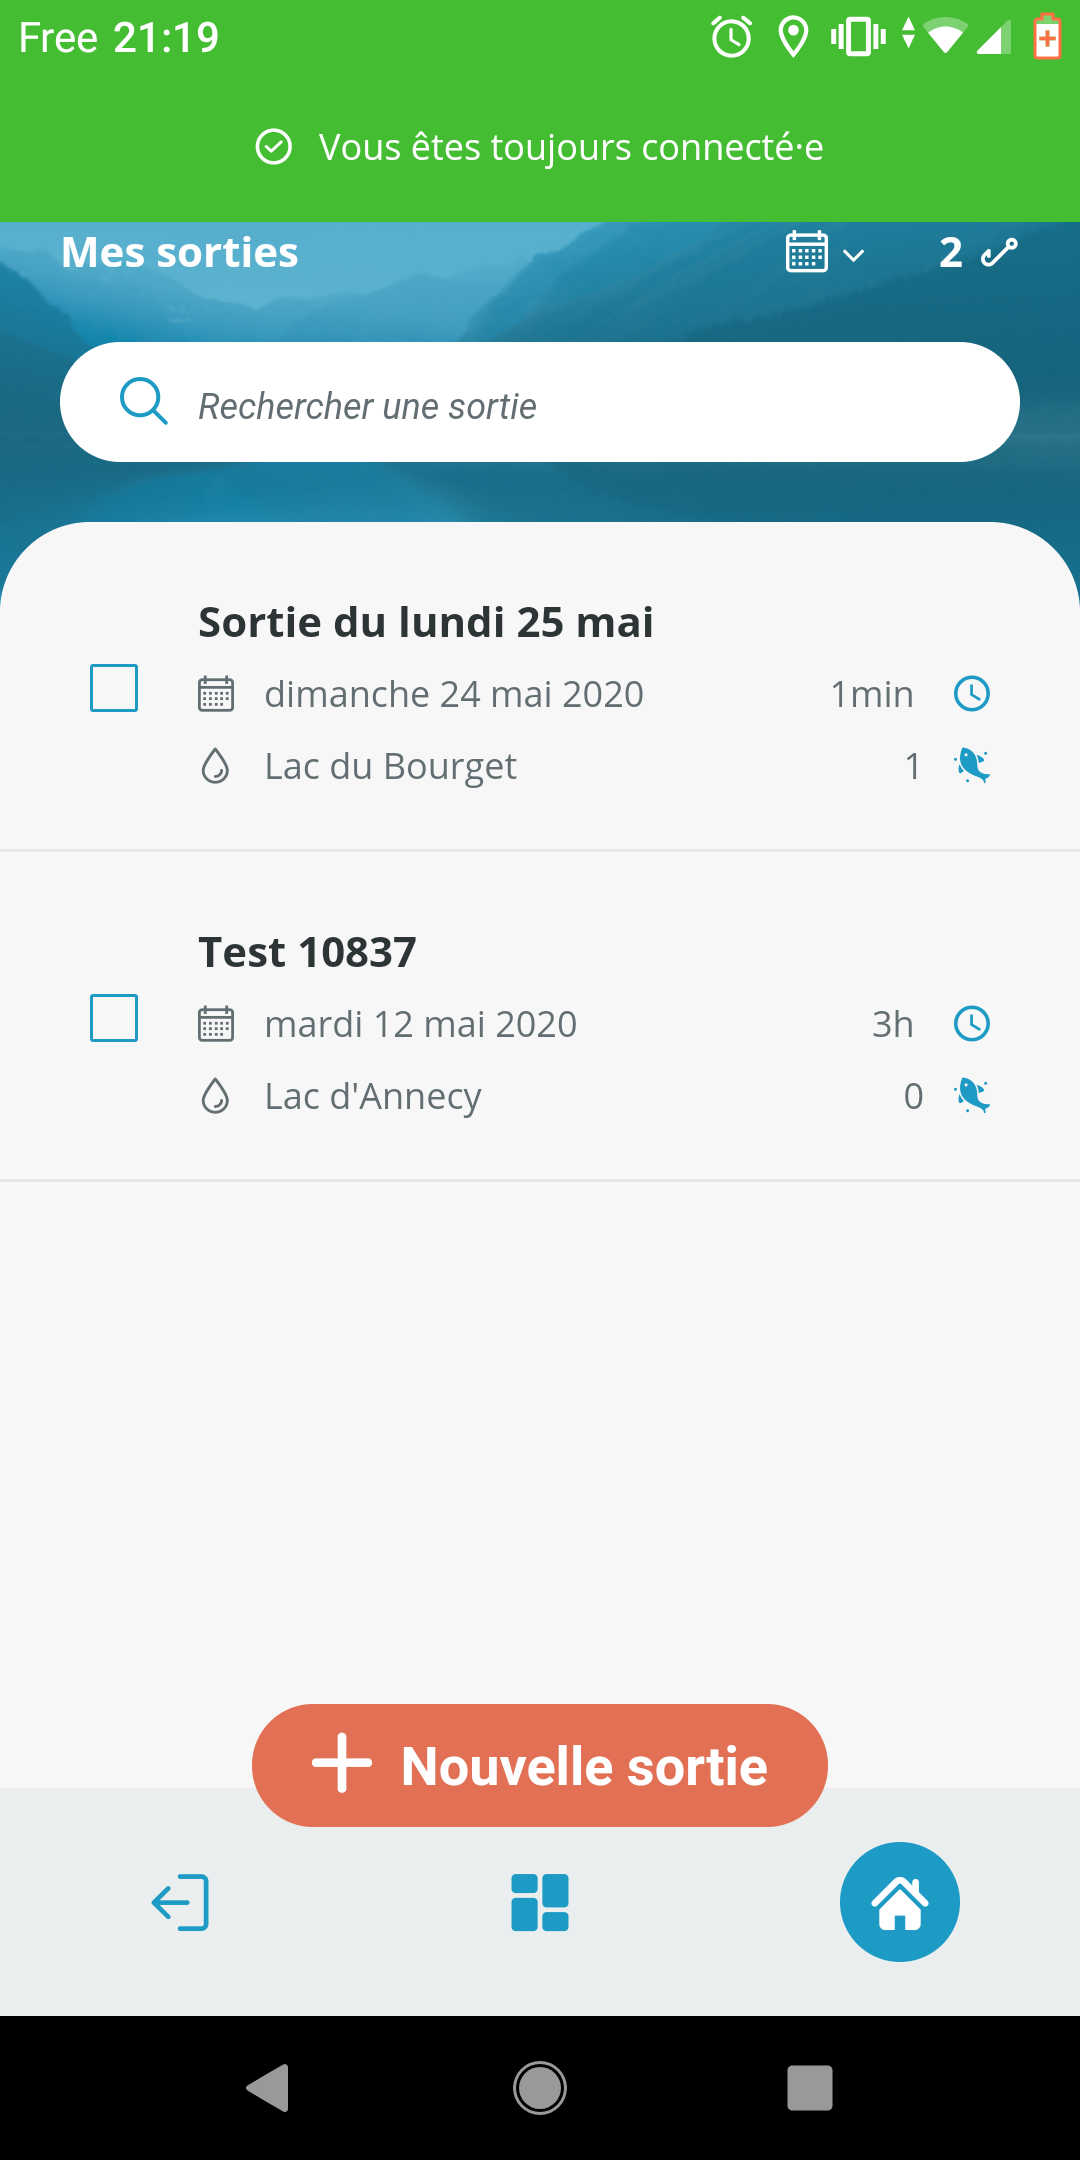
This allows to handle keyboard nicely by hiding some elements and modify the style of some others:
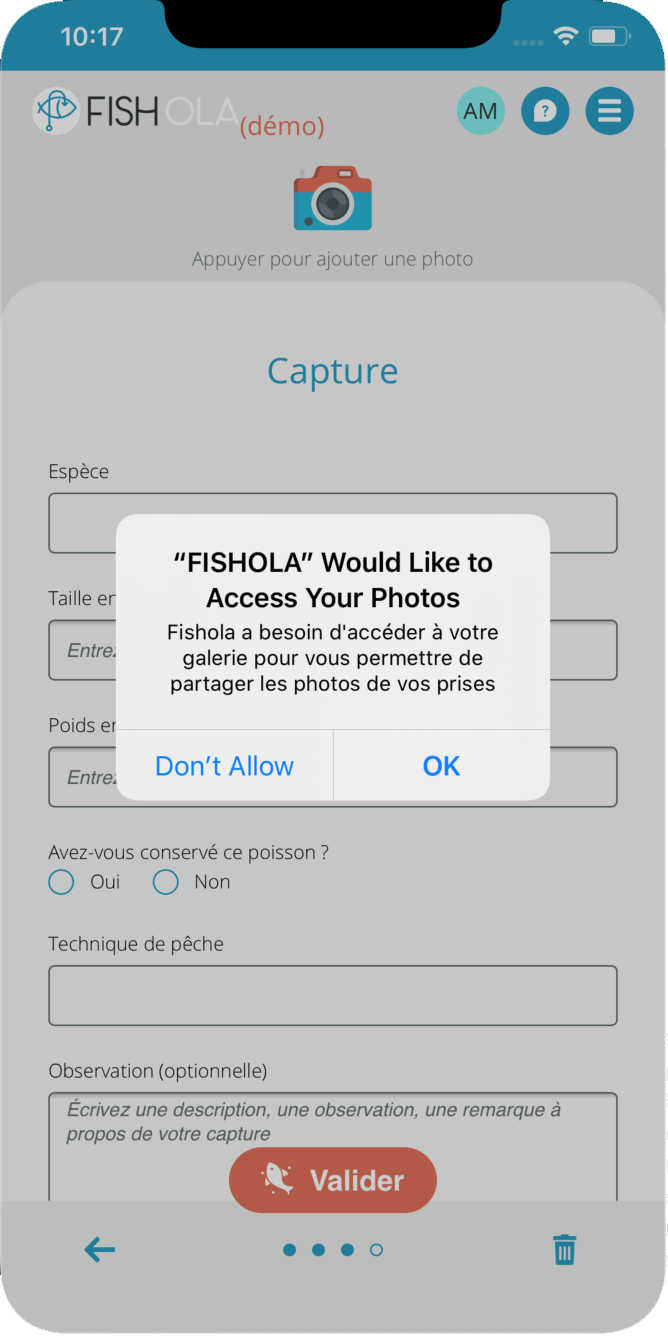
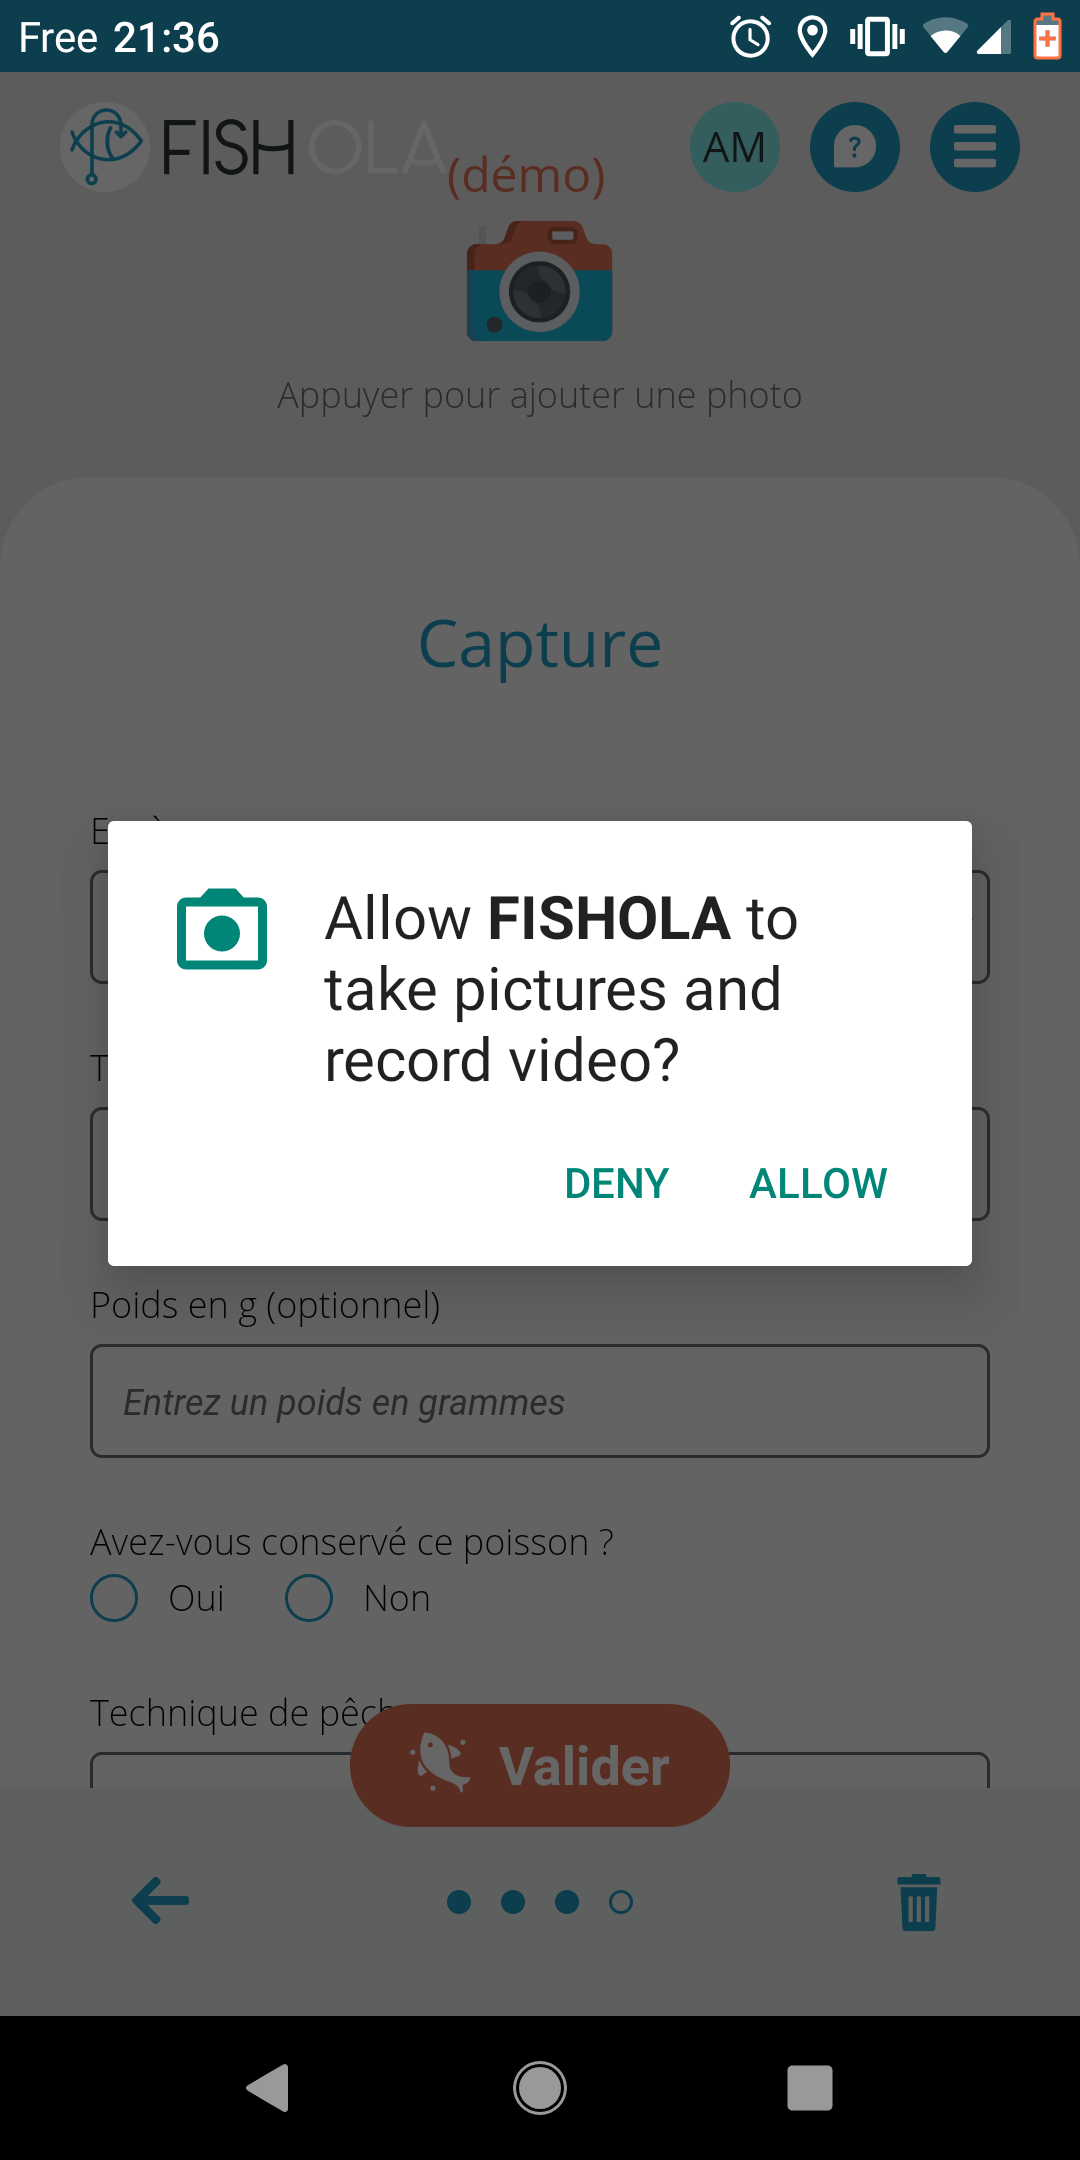
Pictures from Camera and Gallery
The Camera plugin allows to take pictures with your device camera, browse them through gallery, or save a picture into the phone. It also handles all the permission managment, please refer to the [complete tutorial on capacitor website)[https://ionicframework.com/docs/angular/your-first-app/2-taking-photos] for more detailed examples.
import { Plugins, CameraResultType } from '@capacitor/core';
const { Camera } = Plugins;

Camera.getPhoto({
  quality: 95,
  allowEditing: false,
  resultType: CameraResultType.DataUrl,
  promptLabelCancel: 'My Cancel label',
  promptLabelPhoto: 'Select picture from gallery',
  promptLabelPicture: 'Take picture with camera'
}).then(
  image => {
    if (image.dataUrl) {
      MyPicturesService.savePicture(image.dataUrl);
    }
  },
  failure => {
    console.error('[Picture] Unable to take picture', failure);
  }
);
Get or watch user location
The Geolocation plugin allows to get or listen to the user location, again taking charge of permission managment.
import { Plugins, GeolocationPosition, CallbackID } from '@capacitor/core';
const { Geolocation } = Plugins;

// Get position: returns the current location, you won't be getting updates
const coordinates = await Geolocation.getCurrentPosition();

// Watch position: only call this when actually
// needing to listen for position changes
let options = {
    enableHighAccuracy: false,
    maximumAge: 20,
    timeout: 3000
};
let watchId:CallbackID = Geolocation.watchPosition(options, (position, err) => {
  if (error != null && position != null) {
      // Do something with position
  }
});
Universal/App linking
App Links (Android) and Universal Links (iOS) allow your app to intercep some specific URL openings (e.g. https://yourserver.com/path/32), launch itself, and route to some specific screen according to the given URL.
In Fishola, we used it in two scenarios:
- When the user registers, a verification email is sent. When the user clicks on the verify link generated in this email, and if he has the app installed, the application intercepts the link and handles the account verification. If app is not installed, the server handles the link.
- If the user forgot his password, a password reset request email is sent. When the user clicks on the confirmation link generated in this email, and if he has the app installed, the application intercepts the link and handles the password re-generation. If app is not installed, the server handles the link.
On the webapp side, the code is quite straightfoward thanks to the App plugin:
import { Plugins, AppState } from '@capacitor/core';
const { App } = Plugins;

@Component
export default class AppView extends Vue {
  created() {
    // If app is opened from mails when validating account or password forgotten
    App.addListener('appUrlOpen', (data: any) => {
      // Parse date.url and extract action & token
      let token = data.url.substring([...]);
      let action = data.url.substring([...]);
      if ('reset-password' === action) {
        router.push({name:'reset-password', params: {token: token}});
      } else {
        router.push({name:'verify', params: {token: token}});
      }
    });
  }
On the mobile side, please refer to the complete Capacitor tutorial for details as there are lot of steps:
- You must first create an app-site-association files at dedicated urls (e.g.
/.well-known/apple-app-site-association) indicating that your server allows the mobile app to intercept the links - Configure your XCode project to list the supported domains and URLS
- Configure your Android build to list the supported domains and URLS (on Fishola we made the URL depends on the build flavor)
StatusBar and Splashscreen
The StatusBar plugin allows you to change the color of the status bar in Android. This is a detail, yes, but it helps giving a native feel to your app.
First let’s hide the status bar while app is loading.
In your iOS project’s Info.plist:
<key>UIStatusBarHidden</key>
<true/>
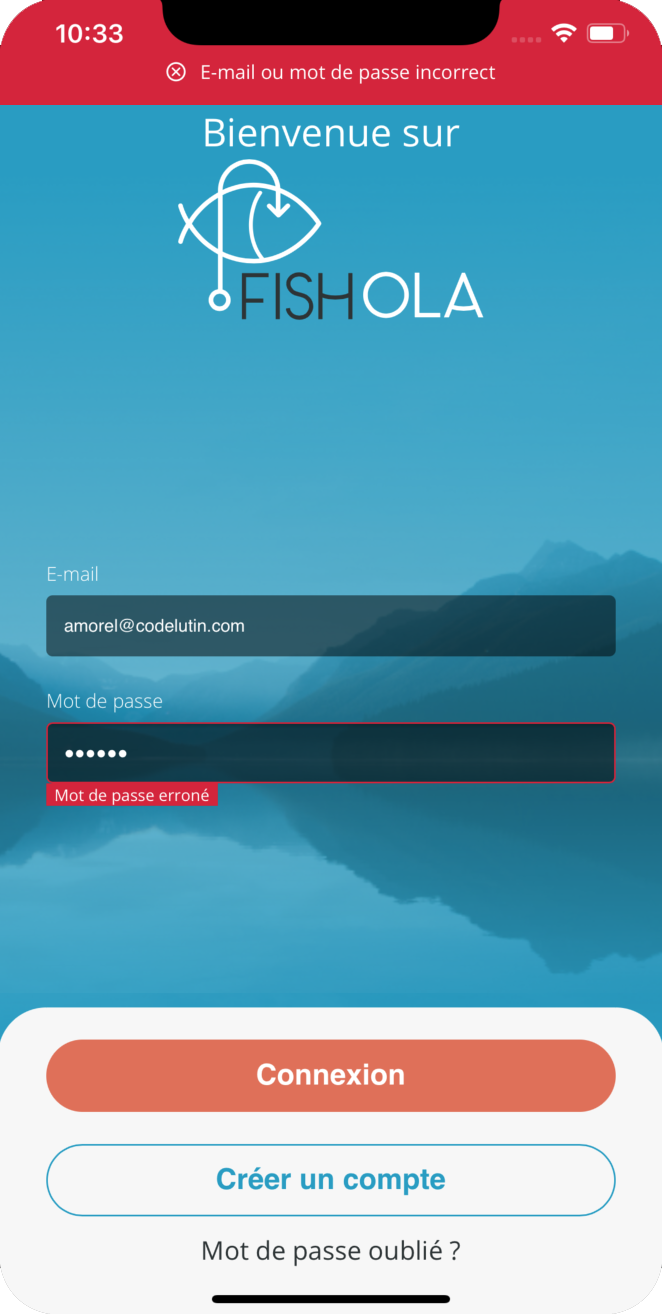
Then while we are trying to loggin with the last valid credentials, we keep the Splashscreen opened. It’s only when the server responds that we hide the Splashscreen, show the StatusBar (with appropriate color according to login status) and route to the login or home screen :
const { SplashScreen, StatusBar} = Plugins;

[...]
mounted() {
  ProfileService.getProfile()
    .then(
      (profile) => {
        // Login success
        SplashScreen.hide();
        StatusBar.setBackgroundColor({"color": "#00FF00"});
        StatusBar.show();
        router.push('home');
      },
      (status) => {
        // Login failure
        SplashScreen.hide();
        StatusBar.setBackgroundColor({"color": "#FF0000"});
        StatusBar.show();
        router.push('login');
      }
    );
}
Going native if you can’t help it
Comming from the Android & iOS community, I know that sometimes you really can’t work around implementing native code. Typically, if you want to use the latest ARKit/ArCore augmented reality features, or implement mobile deep learning image recognition, you may not find a ready-to-use capacitor plugin and have to write a piece of native code.
We did not test this out yet, but from what we read it seems quite easy to write your own native code and even package it as a Capacitor plugin to call it in JS in your webapp. We may have to develop native code soon, be sure that if so we will share our experience with a post.
Automated builds (gitlab)
Android
Building the android app with gitlab is quite easy. We suppose here that you already have a .gitlab-ci file allowing to build your webapp (using npm or maven for instance). Let’s say this web app build is defined in a webapp-build build step.
What we want to do basically is automate the steps we did manually to update the mobile app when webapp changes
- Make sure the webapp is build: cache the
webapp-buildresult so that it can be accessed in next build steps - Run
npx cap copy(to copy the newly build webapp inside the Android app folder) - Build the Android app with gradlew (see gitlab doc for more details)
First, let’s modify our webapp-build to cache the target/dist folder containing our webapp build so it can be used in later build steps
webapp:webapp-build:
  image: maven:3.6-openjdk-11
  stage: webapp
  variables:
    []...]
  cache:
    paths:
      - fishola-mobile/node
      - fishola-mobile/node_modules
      - fishola-mobile/target/dist
  script:
    - mvn clean package
Then let’s define a new stage and use the gitlab example android build
The only difference is that juste before calling gradlew to build we run npx cap copy
stages:
- webapp
- android

[...]
android:android-build:
  image: openjdk:9-jdk
  stage: android
  cache:
    paths:
      - fishola-mobile/node
      - fishola-mobile/node_modules
      - fishola-mobile/target/dist
  script:
    - apt-get --quiet update --yes
    - apt-get --quiet install --yes wget tar unzip lib32stdc++6 lib32z1
    - wget --output-document=android-sdk.zip https://dl.google.com/android/repository/commandlinetools-linux-${ANDROID_SDK_TOOLS}_latest.zip
    - unzip -d android-sdk-linux android-sdk.zip
    - export ANDROID_HOME=$PWD/android-sdk-linux
    - echo y | android-sdk-linux/tools/bin/sdkmanager --sdk_root=${ANDROID_HOME} "platforms;android-${ANDROID_COMPILE_SDK}" >/dev/null
    - echo y | android-sdk-linux/tools/bin/sdkmanager --sdk_root=${ANDROID_HOME} "platform-tools" >/dev/null
    - echo y | android-sdk-linux/tools/bin/sdkmanager --sdk_root=${ANDROID_HOME} "build-tools;${ANDROID_BUILD_TOOLS}" >/dev/null
    - export PATH=$PATH:$PWD/android-sdk-linux/platform-tools/
    - chmod +x fishola-mobile/android/gradlew
    # temporarily disable checking for EPIPE error and use yes to accept all licenses
    - set +o pipefail
    - yes | android-sdk-linux/tools/bin/sdkmanager --sdk_root=${ANDROID_HOME} --licenses
    - set -o pipefail
    - cd fishola-mobile
    - ./node/node node/node_modules/npm/bin/npx-cli.js cap copy
    - cd android
    - cat ${KEYSTORE_FISHOLA_JKS} | base64 -d > keystore-fishola.jks
    - cat ${SIGNING_CONFIG} > app/signin.properties
    - ./gradlew clean
    - ./gradlew assembleBeta
    - cp app/build/outputs/apk/demo/release/*.apk ../../
  artifacts:
    name: "fishola-android-demo-$CI_COMMIT_SHORT_SHA"
    paths:
      - ./*.apk
You may notice that our keystore file and signin config is hidden in build variables and written on-the-fly. Indeed, as we’re on an open source project we cannot make them public, so only build administrators have access to the keystore file and credentials (but you may not have to do this if your sources are private).
We also worked on defining specific build flavors (demo/release/beta) for handling specific deep-linking URLs. You can have a look at our ..gitlab-ci.yml file for further details.
iOS
As stated before, here at Code Lutin we do not like closed environment. In an ideal world, we would like to avoid having to own a macbook to publish XCode builds on the Apple Store. Yet we did not take time to investigate this topic, so we ended up building, signing and publishing the project through XCode. As a capacitor-generated project is a standard iOS project, we did not encounter any issue with this approach.
In the future, we identified 2 solutions for being able to automate XCode build & publication on gitlab :
- Install & configure a GitLab Runner on a Macbook so that gitlab builds can trigger a build on this machine and get the result (see the Gitlab instructions for further details)
- Search for projects like XCode Bots or XCBuild allowing to build Xcode from Linux. From what we read no project is mature enough for being able to automatically upload the app on the Apple Store Connect account
Conclusion
I’m really excited by this first experience with Capacitor, and look foward to continue having fun with it. That being said, we will also try to take a close look at Vue Native & NativeScript Vue, which seem to provide alternative but valid approaches to our need. If you have any information about how to automatically build XCode projects without using a Mac we are definitely interested :)
Was this post useful? Do you have questions, comments, or experiences you’d like to share? Please contact me by mail, on Twitter, Mastodon or raise an issue if you find typos or meaning errors.
If you want to go further, I invite you to watch the Capacitor 2.0 Webinar which provides great demos (such as writing native plugins) and dives into more details than this post. Capacitor is also rectruting right now so contact the dev team if you’re interested in this awesome project.
I’d like to end with by thanking the capacitor team for developping what is about to become, according to me, a game-changer in the mobile dev world.
Thanks for reading !